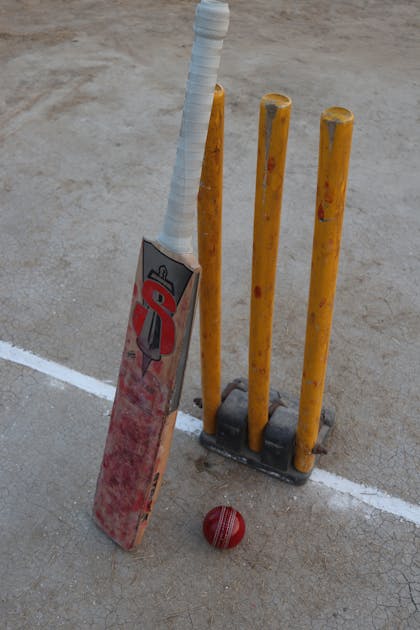
How to Use DRS Cam
DRS Cam helps your club, school, or weekend league review close calls on the pitch without expensive broadcast gear. Park a second mobile phone behind the bowler's stumps, align the pitch lines once, and let the camera record. Every time the scorer enters a ball on the main phone, Skipper automatically cuts a short video clip of that delivery. You can immediately replay the ball frame by frame, slow down the action, and inspect stump lines when a close decision comes up during play.
It helps to understand what DRS Cam is not before setting up your phone. The app does not make decisions for match officials. The on-field umpire always retains the final word, and video clips serve only as clear visual evidence during a review. These clips are built for official review, not social sharing. You will not find a share button on any clip, and Skipper never includes them in public highlights videos.
What You Need
To use DRS Cam during a match, you need two mobile phones: a dedicated camera phone behind the stumps and a scoring phone. You also need a way to keep the camera phone completely steady, such as a small tripod, a heavy cricket bag, or a water bottle. Only listed match officials and scorers can start a session. If a spectator opens the menu, the app displays You're not listed as an official on this match. You cannot start a camera session on a completed or suspended match. Make sure both phones are charged before play begins.
Starting the Camera from the Scorecard
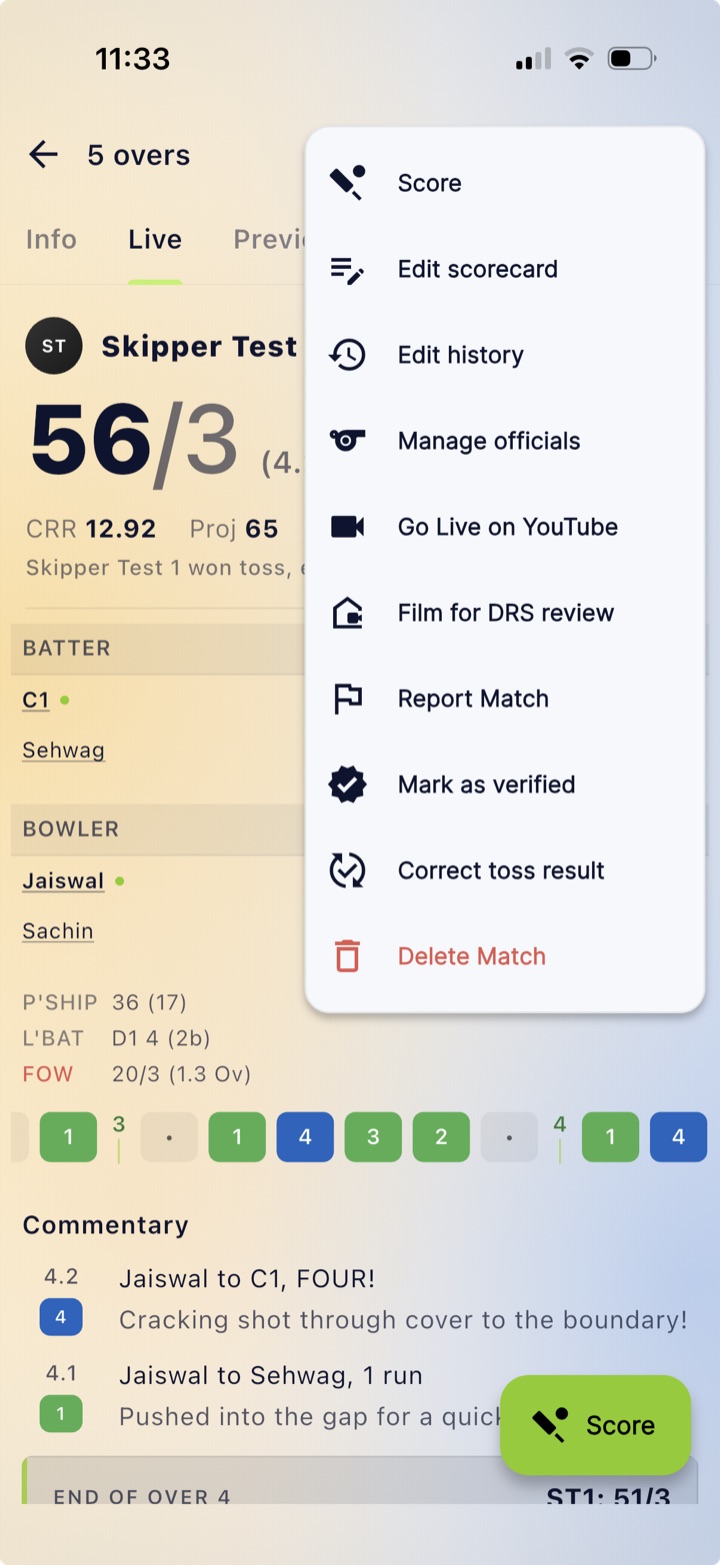
Open the match on your camera phone. Tap the three-dot menu on the scorecard and select Film for DRS review. Alternatively, open the Photos & Videos tab, find the DRS Cam section, and tap Use DRS Cam.
On your first setup, Skipper shows a permission screen titled Before you record. Tap I have permission to proceed.
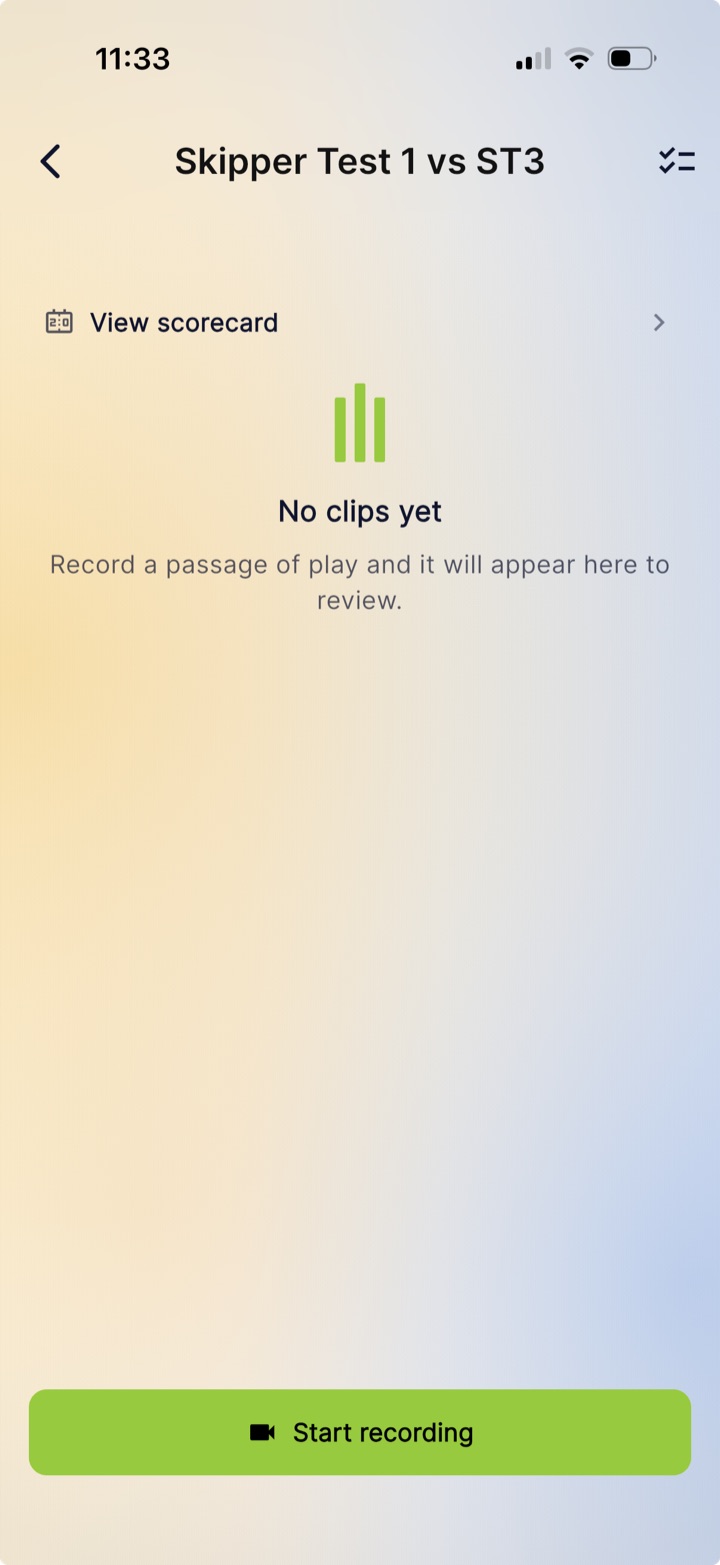
On a new match, the gallery shows No clips yet and Record a passage of play and it will appear here to review.. Tap the large button labeled Start recording. Use the View scorecard link at the top to return to match stats anytime.
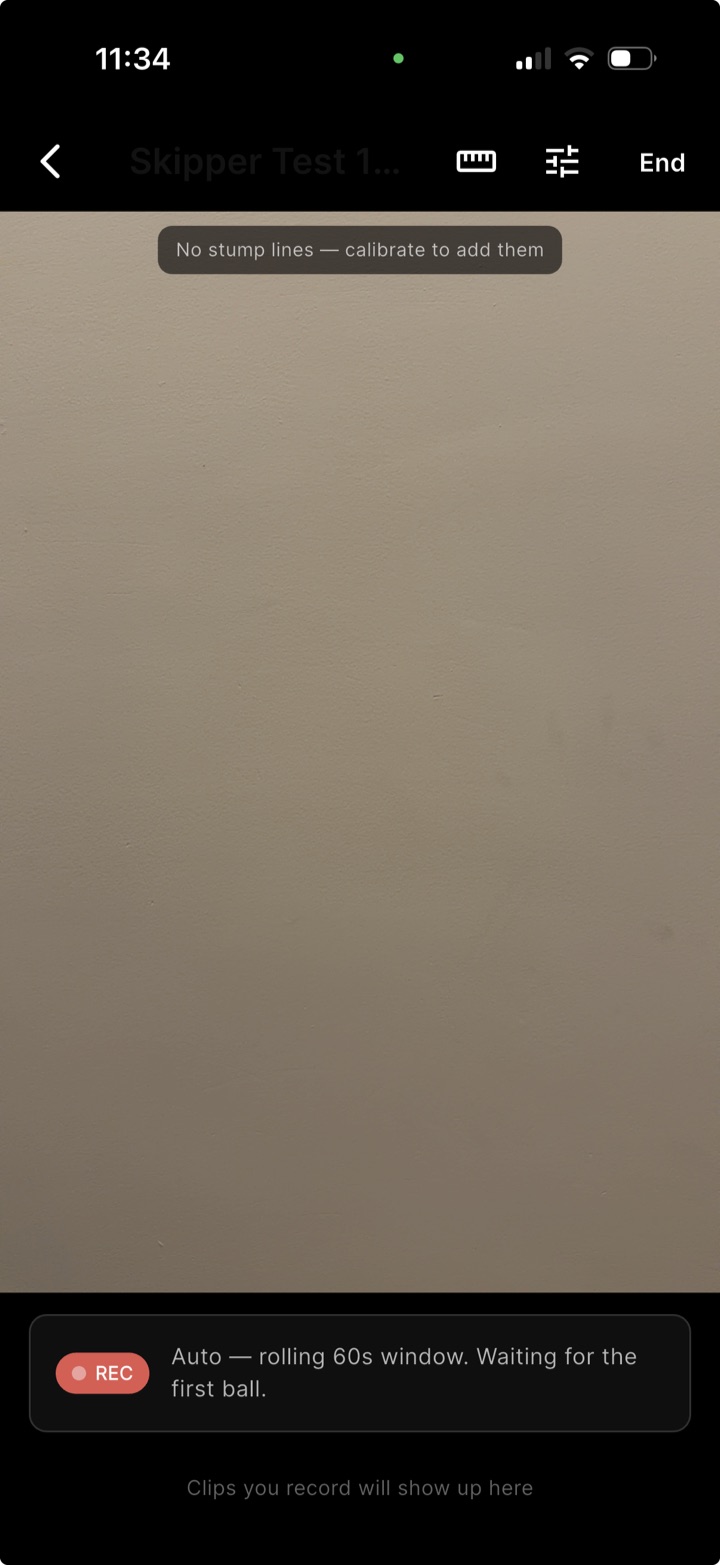
The camera view opens with a top bar featuring a ruler icon, a sliders icon for Capture settings, and an End button. A banner reading No stump lines appears until you calibrate. The bottom strip shows REC Auto, rolling 60s window. Waiting for the first ball. and Clips you record will show up here.
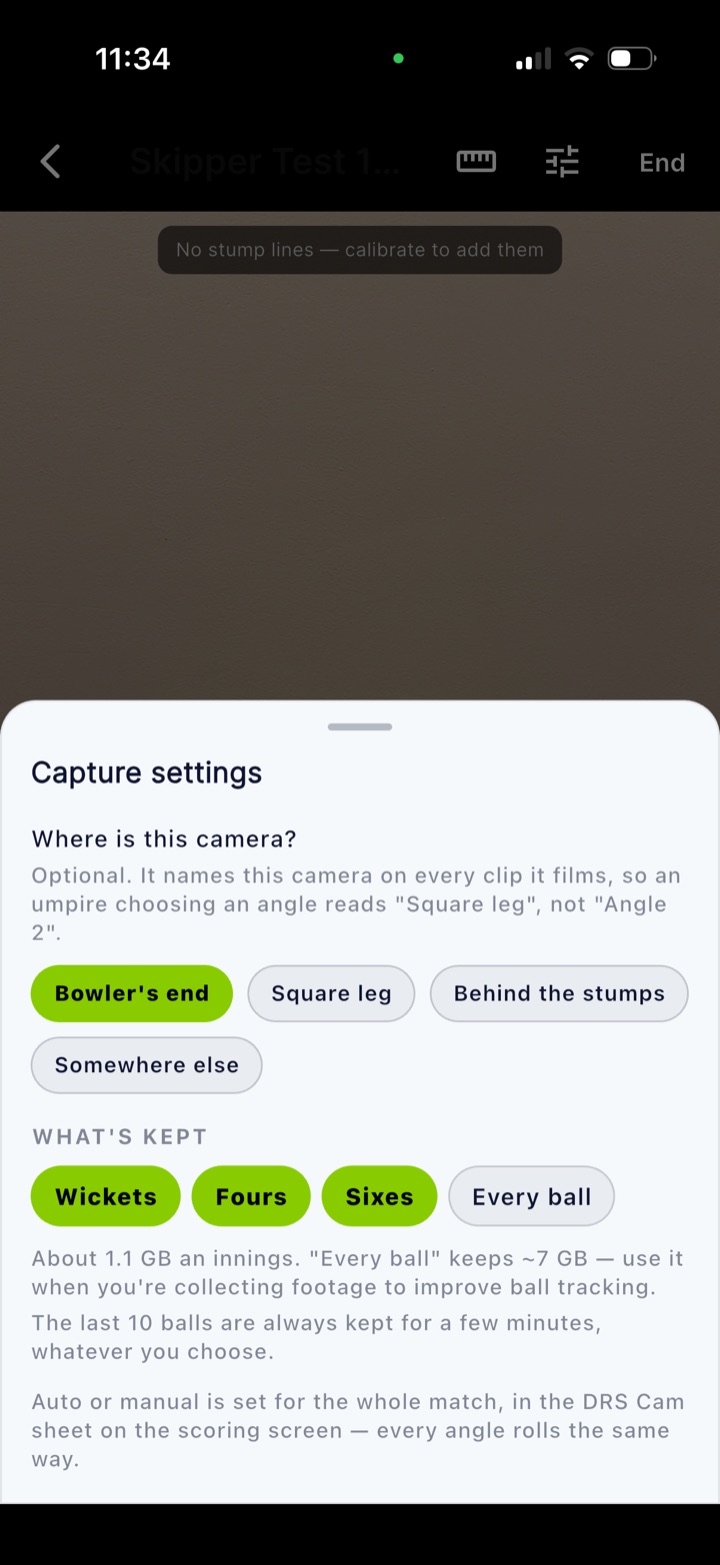
Tap the sliders icon to open Capture settings. Under Where is this camera?, pick a chip: Bowler's end, Square leg, Behind the stumps, or Somewhere else. Naming the position ensures officials read clear text like Square leg instead of Angle 2.
Under WHAT'S KEPT, choose Wickets, Fours, and Sixes (on by default), or select Every ball. Keeping boundaries and wickets uses About 1.1 GB an innings. Every ball keeps about 7 GB.. The app notes that The last 10 balls are always kept for a few minutes, whatever you choose.. Recording mode (Auto or Manual) is set on the scorer's phone.
Marking the Stumps
Tap the ruler icon to open Mark the stumps. Place the phone behind the bowler's stumps, pointing down the pitch on a steady surface. Skipper displays Looking for the stumps… as it scans the scene.
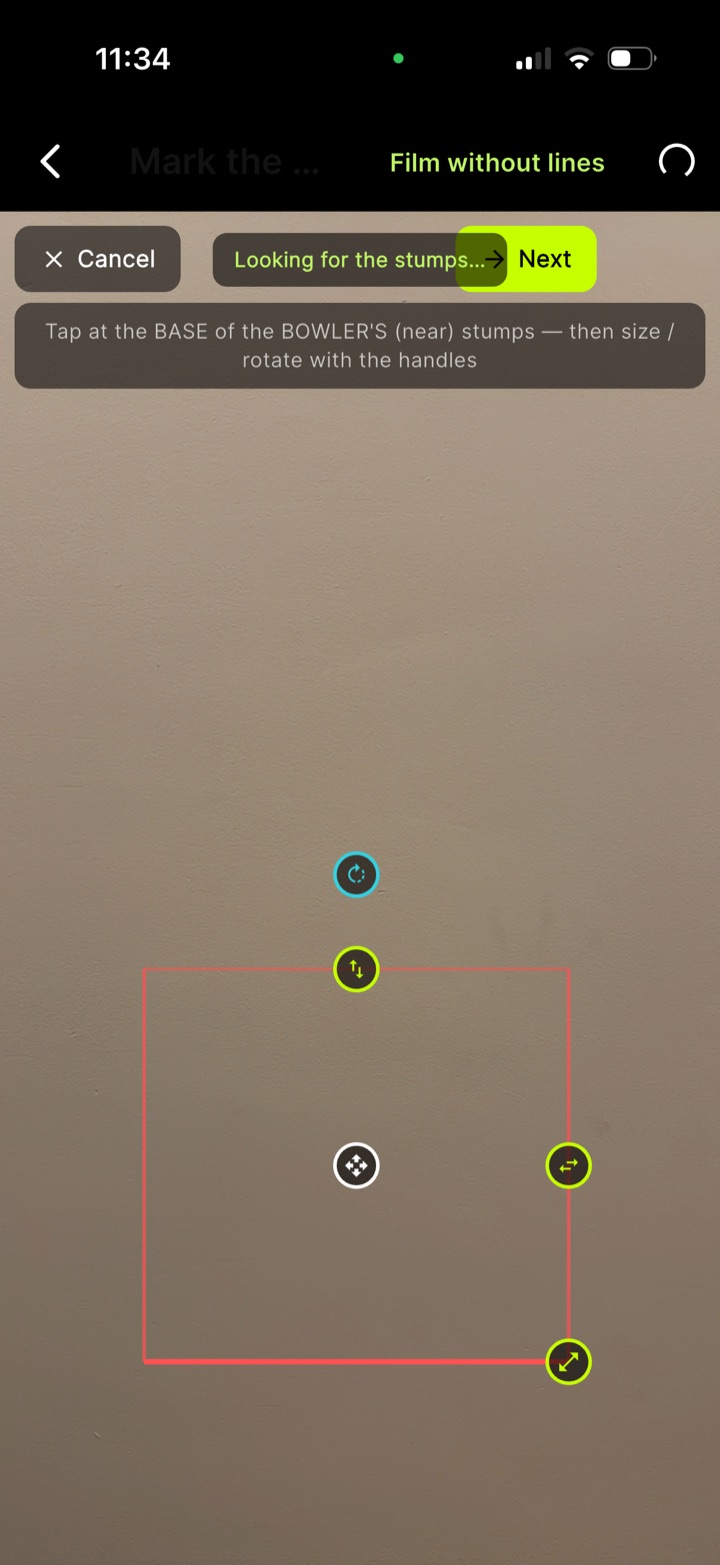
Once detected, the app displays Found the stumps or Drag the boxes onto the stumps. Follow the hint: Tap at the BASE of the BOWLER'S (near) stumps, then size / rotate with the handles. Use the handles to move, rotate, or stretch the boxes. The bottom bar offers Cancel, Next, Detect again, and Film without lines. When aligned, tap Stumps look right.
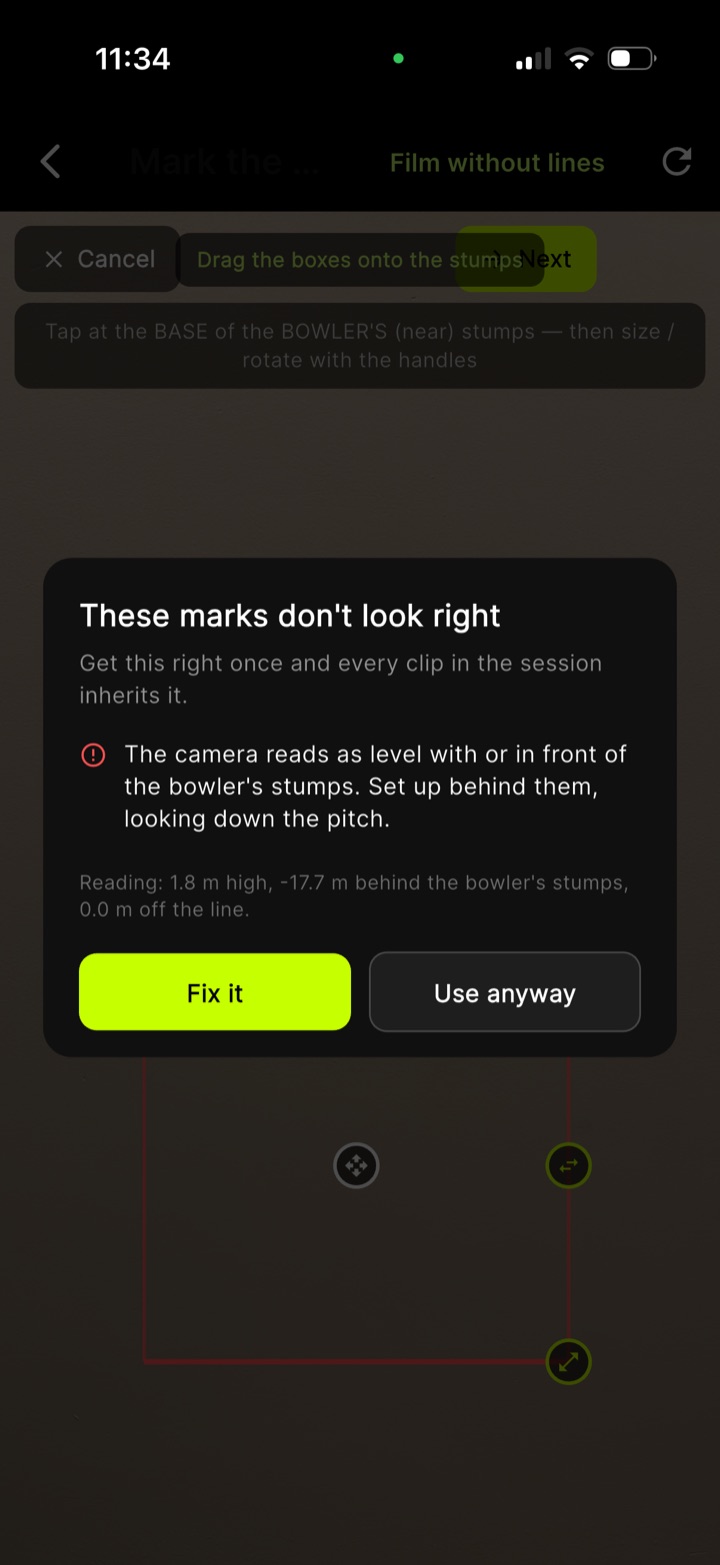
If alignment seems impossible, Skipper opens a check: These marks don't look right. It warns: Get this right once and every clip in the session inherits it.. If the angle is invalid, it shows The camera reads as level with or in front of the bowler's stumps. Set up behind them, looking down the pitch. with readouts like 1.8 m high, -17.7 m behind the bowler's stumps, 0.0 m off the line. Tap Fix it to adjust placement or Use anyway to proceed.
Once confirmed, every clip carries stump overlay lines. If the phone shifts during play, tap Recalibrate stumps to re-align lines anytime.
On the Scorer's Phone
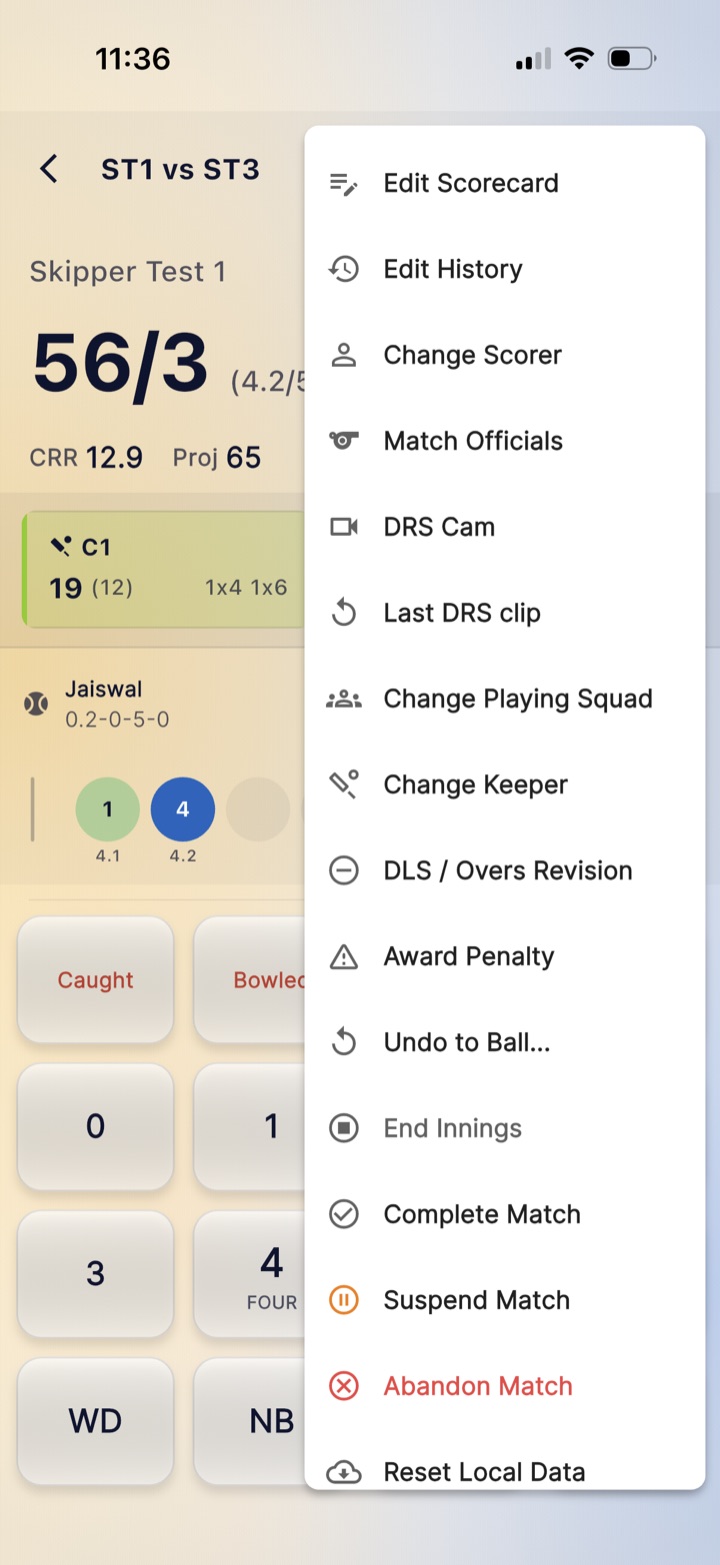
On the scoring phone, open the scoring screen menu to find DRS Cam and Last DRS clip.
Tap DRS Cam to open the controls. An empty angle row shows No camera yet, Pair a phone to film this angle., and a Pair button. Tap Add another angle to add a second camera. Under WHEN THE CAMERAS ROLL, choose Auto or Manual. Auto is Always rolling, keeps the last 60s. Never misses a ball., but uses More battery. Manual lets you Tap REC as the bowler runs in. Stops when you score the ball., which Saves battery. Pick Auto when plugged into a power bank, or Manual to conserve power. A footnote reminds you: Open an angle with its gear icon to say where it stands and what it keeps..
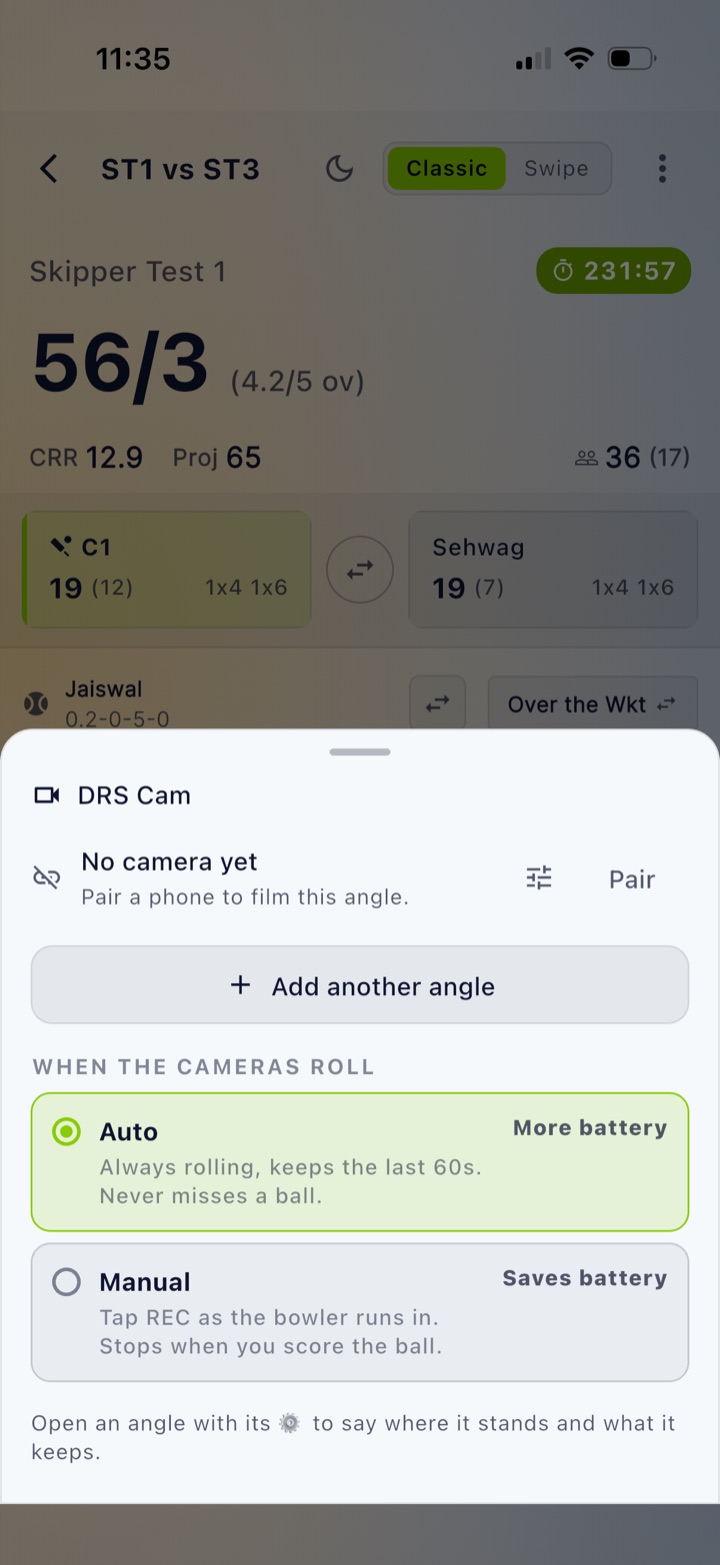
To pair, tap Pair on the scorer's phone for a 6-digit code that Expires in 5 minutes, and works once.. On the camera phone, tap Join a session, enter the code, and tap Join as camera. Upon success, it confirms Camera paired. It films each ball the scorer records.. Select the camera position, or use the scorer's phone as the camera device.
In Auto mode, recording is continuous. As soon as you score a ball, Skipper cuts the passage since the last ball and tags it, such as 12.3 · Wicket, FOUR, or SIX. In Manual mode, tap the REC pill on the over row as the bowler runs in; it stops when you score the ball. Long-press REC to cancel.
Reviewing the Last Ball
To review a decision, tap the scoring menu and select Last DRS clip to open Ball review. Controls include play/pause, a scrub bar, and single-frame step buttons. Adjust playback speed between 1x and 0.5x. Toggle overlays with Show stump lines or Hide stump lines, or tap Mark stumps if lines are missing. With two cameras, select an angle by name or tap Compare angles for side-by-side view.
Tap Add a note or Tag this moment to attach notes. Pick category chips like LBW shout, Caught, Run out, Edge, No ball, or Wide. Add text such as Pitched in line, hit pad first and tap Save note.
To view older replays, open the Photos & Videos tab on the match screen to find the DRS Cam section titled Ball replays for umpire review. Filter clips by All, Wickets, or Boundaries. Replays are also accessible directly from any delivery in the commentary list.
Good to Know
- Keep your camera phone plugged into a power bank because continuous recording in Auto mode consumes battery.
- Keep the camera app active. If it goes to the background, recording stops and displays The camera stopped. Tap the preview to restart it..
- Clips upload to cloud storage in the background, so an evicted local file still streams from the cloud.
- To wrap up, tap End and confirm with End this session? or End session.
- Clips are strictly for match evidence; there is no share button, and they are never used in highlights.
- Both iPhone and Android devices film and review with frame stepping and stump lines.